How to start a laser engraving business
Starting a laser engraving business has a total startup cost of roughly $400–$6,000 (machine, ventilation, safety gear, and a first material buy) and lets you sell personalized gifts, signage, awards, and B2B engraving — a scalable maker business where the laser does the repetitive work while you handle design, pricing, and sales. This is a practical, step-by-step playbook for choosing the right machine, running it safely, pricing by machine time, and landing repeat personalized and custom orders.
- Startup cost
- $400 – $6,000
- Time to first sale
- 2 – 8 weeks
- Note: A desktop diode or CO2 laser and a small product line can reach first sale in a couple of weeks; mastering material settings and building a clean variant catalog takes longer.
- Difficulty
- Moderate
Last reviewed · Rates, fees, and regulatory thresholds in this guide can change — verify the linked sources before acting.
The short version
Laser engraving is unusually scalable for a maker business: a machine does the repetitive work, personalized goods command gift-level prices, and demand for custom signs, gifts, awards, and promotional items has been a consistent driver of the craft marketplace. But it has three traps. Safety is non-negotiable — lasers are an eye hazard, cutting and engraving produce hazardous fumes that need real ventilation, a running laser is a fire risk, and some materials (PVC and vinyl above all) release toxic gas and must never go in a laser. Pricing is the second: machine time, consumable and tube wear, design and setup labor, and machine depreciation are the costs new operators leave out. Third is the variant explosion — one product becomes dozens of SKUs across material, size, design, and personalization text. Startup cost runs roughly $400–$6,000 (as of 2026) depending on whether you start with a diode or CO2 machine — a fiber laser for metal runs higher, up to $10,000 or more — and time to first sale is typically 2–8 weeks. The path: pick a machine and niche, set up safely, dial in material settings, price by machine time plus labor, then sell where personalized goods move. This guide walks each step with rough cost ranges and free tools for the job-cost math.
Good fit if…
- You like dialing in a process and producing clean, consistent, repeatable work
- You have $400–$6,000 for total startup (machine, ventilation, safety gear, and a first material buy) and can set up a fire-aware workspace
- You're comfortable with design software (or willing to learn) for custom and personalized work
- You like selling personalized gifts on Etsy and at markets, or doing local awards, signage, and B2B engraving
Probably not for you if…
- You won't set up proper fume extraction and follow laser-safety practice — these are health and fire risks, not optional extras
- You aren't willing to price machine time, design labor, and machine depreciation — laser margins die on under-charged custom work
- You expect zero learning curve on material settings — every material and machine takes testing to dial in
- You plan to engrave licensed characters, team logos, or brand marks without permission — that's an infringement risk that can end a shop
Tip: Laser engraving is one of the few maker businesses where a single machine does the repetitive work while you handle everything else — a real force-multiplier. Many makers start with an affordable desktop laser and a focused line of goods they can ship.
End-to-end timeline for a new laser engraving shop
If you start with a desktop diode or CO2 laser and a focused product line, first sale can come in a couple of weeks. Building a deep settings library and a clean variant catalog takes longer. The midpoint of the band below is about five weeks.
- Choose machine + set up safety1–2 weeks
Pick the machine for your niche, set up fume extraction and laser-safety gear, and register the business.
- Dial in materials + settings1–3 weeks
Run material test grids, build a settings library, design your first products, and finalize finishes.
- Cost + photograph + list1–2 weeks
Cost each piece by machine time plus labor, build mockups and product photos, and write listings or a line sheet.
- Launch + first orders1–4 weeks
Open listings or work a market; B2B and custom work ramps slower as outreach turns into quoted, deposited jobs.
2–8 weeks to first sale
The 8-step playbook
Run these in order. Skipping ahead is the most common reason new makers ship inconsistent product or under-price their work.
Step 1: Choose your machine and product niche
Two decisions that cascade into everything else: which machine you buy, and what you make with it. A diode laser, a CO2 laser, a fiber laser, and a CNC router cut and mark different materials at very different price points — and your niche should drive the machine, not the other way around.
Machine types compared
Match the machine to the materials your niche needs. The first three are lasers — diode is the cheapest start for wood and personalized goods, CO2 is the versatile workhorse, fiber specializes in metal. The CNC router is included for comparison only: it's a different machine that covers dimensional work a laser can't. Machine costs below are rough ranges as of 2026.
| Option | Best materials | Cut vs mark | Typical machine cost | Best for |
|---|---|---|---|---|
Diode laser Affordable entry point. | Wood, leather, slate, coated metals | Mark well; cut thin stock slowly | $300–$1,500 | Personalized goods on a budget |
CO2 laser Versatile workhorse. | Wood, acrylic, leather, glass, slate, paper | Strong cut and mark | $1,000–$7,000+ | Gifts, signage, awards, mixed lines |
Fiber laser Metal specialist. | Bare and coated metals; some plastics | Deep permanent metal marking | $3,000–$10,000+ | Industrial marking, hardware, jewelry |
CNC router Dimensional cutting (not a laser). | Thicker wood, sign foam, plastics | 3D carve and cut | $500–$5,000+ | Dimensional signs, larger pieces |
Material capability depends on wattage, optics, and accessories (e.g., a rotary attachment for tumblers, or marking spray for bare metal on a diode/CO2) — treat the rows as general guidance and confirm against the specific machine's specs. Price ranges are rough illustrations as of 2026 that vary widely by brand, wattage, and bundle and move quickly — verify current pricing before buying. Most shops start with one machine and add a second as a niche proves out.
The machine determines what materials you can mark or cut, which determines what you can sell. The four common machine types for a small shop:
- Diode laser — the most affordable entry point. Great for engraving wood, leather, slate, and (with a marking spray or on coated/anodized surfaces) some metals; can cut thin wood and acrylic slowly. Compact, often open-frame (which makes eye safety and ventilation your responsibility). The usual starting machine for personalized goods.
- CO2 laser — the workhorse for engraving and cutting wood, acrylic, leather, glass, slate, and paper. Faster and more capable than a diode for cutting; many are enclosed (safer and cleaner). Higher cost, and the tube is a wear item that eventually needs replacing.
- Fiber laser — the metal specialist: deep, permanent marking on bare metals and strong on engraving hardware, tools, and jewelry. More expensive and more specialized; pair it with a metal-goods or industrial-marking niche, not a general gift line.
- CNC router — not a laser at all, but often considered alongside one: it cuts and carves thicker wood, sign foam, and plastics in three dimensions. Useful for dimensional signs and larger pieces a laser can't do; messier (chips and dust) and a different skill set.
Common niches and the machine that fits each: personalized gifts (cutting boards, tumblers, ornaments, signs — diode or CO2), wedding and event goods (signage, favors, place cards — CO2 or diode), awards and trophies (acrylic, glass, plaques — CO2), industrial and metal marking (tools, parts, firearms-adjacent hardware — fiber), and B2B promotional products (branded items for local businesses — CO2 or fiber). The comparison table above summarizes the trade-offs so you can match the machine to the niche before you spend.
Step 2: Set up the legal basics, insurance, and laser safety
Laser engraving carries a light regulatory load but two serious liabilities: the machine can injure you (eyes, fumes, fire), and what you engrave can land you in an intellectual-property dispute. Handle the ordinary business setup, then take laser safety and IP seriously.
The ordinary business setup is straightforward:
- A business structure. Most makers start as a sole proprietorship or form a single-member LLC for liability separation. See the SBA's guide to choosing a business structure (opens in new tab), and apply for a free EIN from the IRS (opens in new tab).
- A state sales-tax permit in states with sales tax (most have one). If you do B2B or wholesale engraving, you'll also want a resale certificate.
- Business / product liability insurance. Worth carrying — an engraved product can injure if it fails, and many craft fairs and B2B clients require proof of coverage. Insurers may ask about your fire-safety setup given the laser.
Two product-and-content rules specific to engraving:
- Intellectual property. Engraving licensed characters, sports-team logos, song lyrics, or company brand marks onto products you sell — without a license — is trademark or copyright infringement, and a direct route to marketplace takedowns, cease-and-desist letters, and account suspension. Sell your own designs, properly-licensed art, or genuinely generic motifs; for a client's own logo, get written permission. The USPTO's trademark basics (opens in new tab) are a useful primer.
- Children's items. Engraved toys or items for children 12 and under can fall under the Consumer Product Safety Improvement Act (CPSIA) (opens in new tab), which can require testing and tracking labels — a meaningful step up in obligations many small shops simply avoid.
And the part that is genuinely non-negotiable — laser safety. Lasers are an eye hazard, the fumes from engraving and cutting are a health hazard, and a running laser is a fire risk. The callout below covers the essentials; treat them as setup costs, not optional extras. The FDA regulates laser products for radiation safety under the FDA laser product performance standard (21 CFR 1040) (opens in new tab) — buy a machine from a reputable maker that's labeled and compliant for its laser class, and never defeat its safety interlocks or enclosure. And never laser PVC or vinyl: heating it releases hydrogen chloride, which forms corrosive hydrochloric acid and is a documented respiratory hazard (see the NIOSH Pocket Guide entry for hydrogen chloride (opens in new tab)).
Safety warning: Eyes, fumes, and fire — set up laser safety before you sell
Laser light can permanently damage your eyes: keep enclosure panels and interlocks in place, and on an open-frame machine wear laser-safety glasses rated for that exact wavelength. Engraving and cutting release hazardous fumes and fine particulate — run a fume extractor or vent outdoors, never just an open window. A laser can ignite the material it's cutting, so never leave a running machine unattended and keep a fire extinguisher within reach. And never put PVC, vinyl, or unknown plastics in a laser: they release hydrogen chloride (HCl) gas that is toxic to you and corrodes the machine. Test only known, laser-safe materials.
Step 3: Set up your shop: machine, materials, and software
Beyond the machine itself, a working laser shop needs ventilation, a small smart material buy, and a design-to-machine software path. Resist stockpiling exotic blanks before you know what sells.
A workable starter setup, beyond the laser from step 1:
- Ventilation / fume extraction — a dedicated fume extractor or a ducted vent to the outdoors. This is required, not optional — skipping it risks hazardous fumes and fire (see the safety callout in step 2) — and it's one of the purchases new operators most often skip.
- Laser-safety glasses rated for your machine's wavelength (especially for open-frame diode lasers), and a fire extinguisher rated for the materials you'll cut.
- Accessories that expand what you can make — a rotary attachment for engraving tumblers and bottles, a honeycomb bed for cleaner cuts, an air assist to reduce flare-ups and scorching.
- Design software — a vector design tool (Adobe Illustrator, Affinity Designer, or the free Inkscape) plus your machine's control software (e.g., LightBurn for many CO2/diode machines, or the bundled software for closed ecosystems like Glowforge). Vector files keep engraving crisp at any size.
- A small material buy for your launch products — common laser-safe materials include hardwood and Baltic-birch plywood, cast acrylic, leather, slate, glass, and coated or anodized metals (or bare metal with a marking spray). Buy one or two materials for your first products rather than stockpiling.
- Masking and finishing supplies — transfer/masking tape to keep engraving smoke off the surface, plus the cleaners and finishes each material needs.
Total starter outlay runs roughly $400–$1,500 if you start with a diode laser and a modest material buy, up toward $6,000 for a capable CO2 plus ventilation, accessories, and software — and higher still for a fiber machine, which can run $10,000 or more (see the machine-type comparison in step 1). Buy for your first products, validate that they sell, then reinvest revenue into the machine or accessory that removes your biggest bottleneck.
What not to buy in month one: a second machine "to be ready," a large inventory of a material you haven't tested, or every accessory at once. Add the rotary when tumbler orders justify it; add the second machine when the first is running at capacity.
Step 4: Dial in materials, settings, and a repeatable process
A business needs the same piece to come out the same way every time. Before you build a catalog or take custom orders, build a settings library, a repeatable production sequence, and a finish you trust for each material.
The leap from hobby to business is consistency. A one-off that turns out great is a hobby; a piece you can reproduce to the same quality and cost fifty times is a product.
Build a settings library
- Run material test grids — for each material, test combinations of power, speed, and passes (and line interval / DPI for engraving) and record the settings that produce the result you want. A saved settings library per material and thickness is where your speed and consistency come from.
- Account for material variation. Wood grain, acrylic type (cast engraves frosty white; extruded behaves differently), and metal coatings all change the result. Note the supplier and material spec alongside the settings, because a different batch can behave differently.
- Document the build. For each product: the file, material and size, machine settings, masking step, run time, and finishing steps. This is both your production recipe and the basis for accurate costing (step 5).
Get the finish and quality right
- Clean up engraving residue — mask before engraving where it helps, and clean smoke/resin off the surface afterward. Surface finish is most of what separates a hobby piece from a sellable one.
- Match the finish to the use — a food-contact item (an engraved cutting board) needs a genuinely food-safe finish and care instructions; décor and signage need a durable finish appropriate to where they'll live. Test your finish on an offcut before a sellable piece.
Keep a short log of material, settings, run time, and minutes of hands-on labor per piece. That log is your repeatable recipe and the raw data for honest pricing — exactly the kind of production record Ardent Seller is built to hold (step 7).
Step 5: Price by machine time, materials, and design labor
This is where laser businesses quietly lose money. The material blank is easy to count; the costs new operators omit are machine time, consumable and tube wear, the design and setup labor on custom work, and the depreciation of an expensive machine. Price all of them.
Build your price from a real cost stack, then apply a markup — don't reverse-engineer a price from what feels sellable.
What a piece actually costs
- Material blank and consumables — the wood, acrylic, tumbler, or metal blank, plus masking tape, finish, and packaging.
- Machine time. A laser engraving a detailed design can run roughly 10–40 minutes per piece depending on size, design complexity, and fill density (the worked example below uses 25). Charge a per-minute or per-hour machine rate that covers electricity, air-assist and extraction running costs, and — critically — consumable and tube/diode wear (a CO2 tube is a finite, replaceable part; price in its amortized cost per hour).
- Design and setup labor at a real rate. Custom work front-loads design time: building or cleaning a file, proofing it with the customer, and setting up the job. This is a cost many new operators don't bill — charge it, especially for one-off custom orders.
- Machine depreciation and overhead. An expensive machine wears out and should be earning back its cost; allocate depreciation across the pieces it makes, along with software subscriptions, rent, and shop overhead.
Worked example: a personalized 12-by-9 in. Baltic-birch sign
Using illustrative rates you'd swap for your own: say the birch blank and finish cost about $6 and packaging $2. The laser runs 25 minutes; at an example $30/hr machine rate (covering power, extraction, and tube/diode wear) that's about $12.50 of machine time. Add 15 minutes of design and setup plus 10 minutes of masking, weeding, and finishing — 25 minutes of labor at an example $25/hr rate is about $10. Allocate roughly $3 of machine depreciation and overhead. That sums to about $33–$34 ($8 + $12.50 + $10 + $3). Notice that machine time and labor, not the wood, dominate.
A rule of thumb common in the handmade-goods community is wholesale around 2x total cost and retail around 3–4x — so the roughly $34 sign above lands near $68 wholesale and $100–$135 retail. But as with any labor- and machine-time-heavy product, the multiplier has to sit on a complete cost that includes machine time, wear, and design labor. Apply it to a cost that omits those and you'll under-price. The economics also differ by order type:
- Catalog / repeatable goods — once the file and settings exist, design labor is near zero and you compete on efficient machine time; batching identical pieces protects margin.
- Custom / personalized one-offs — charge a design/setup fee on top of the per-piece cost, and take a deposit on larger custom jobs before you cut material you can't resell.
The job-cost and pricing calculators below turn this stack into a defensible price using your own material cost, machine rate, labor rate, and target margin.
Step 6: Choose where to sell
Where you sell follows what you make. Personalized gifts ship and thrive on marketplaces; awards, signage, and promotional work are local and relationship-driven. Match the channel to the product rather than forcing every piece onto one platform.
The common channels, by what they fit:
- Etsy — a strong fit for personalized and custom gifts (signs, ornaments, tumblers, cutting boards) with huge built-in demand for personalization. Be aware of the stacked fees — listing, transaction, payment processing, and optional Offsite Ads — covered in the Etsy shop guide. Personalized listings also need a clean way to capture the buyer's custom text and proof it.
- Local markets and craft fairs — direct sales and instant feedback, and a great venue for on-the-spot personalization that draws a crowd. Booth fees and weekend time are the cost.
- Local B2B: awards, signage, and engraving services — trophies and plaques for leagues and schools, signage and branded items for local businesses, and one-off engraving services. Predictable, higher-ticket, relationship-driven work that marketplaces don't reach.
- Promotional products and wholesale — branded items in volume for local companies and events, or wholesale of your catalog goods to boutiques. Build a line sheet with photos, pricing, MOQ, and lead time; get written permission for any client logo you engrave.
- Your own Shopify / Squarespace store — full margin and control for your catalog and custom-quote intake. You drive the traffic, so usually a phase-2 channel.
A common opening combination is Etsy for personalized gifts (built-in demand now) plus local B2B outreach for awards and signage (higher-ticket, repeatable later). Pick the channel that fits your primary product, run it for a few weeks, then layer the second. Whatever the mix, you'll track materials, machine time, and a growing variant catalog across all of it — the next step.
Step 7: Track materials, machine depreciation, variants, and taxes
Laser engraving creates a specific operational problem: an expensive machine to depreciate, consumable materials cut across many jobs, and a product line that explodes into dozens of variants once personalization is involved. Knowing your true cost per piece — and what's actually in stock — is the reality once orders start.
For a handful of products a spreadsheet works. Past that, the math gets brittle:
- One product becomes many SKUs — material, size, design, and personalization text — and a spreadsheet stops tracking what's in stock. (This is exactly what automatic SKU generation across material and size combinations is built for: e.g., SIGN-WALNUT-12x9.)
- You buy sheet material and blanks in bulk, consume them across many jobs with offcut waste, and manual per-piece costing drifts fast.
- Custom quotes need a real cost stack — material, machine time, wear, and design labor — and a guessed number either loses the job or loses money on it.
- The machine that cost thousands needs to earn its depreciation back, and you can't see whether it is.
- Material prices change between buys and your true COGS quietly moves with them.
- Tax time arrives and you can't tell the IRS what the pieces you sold cost to make, or depreciate the machine correctly.
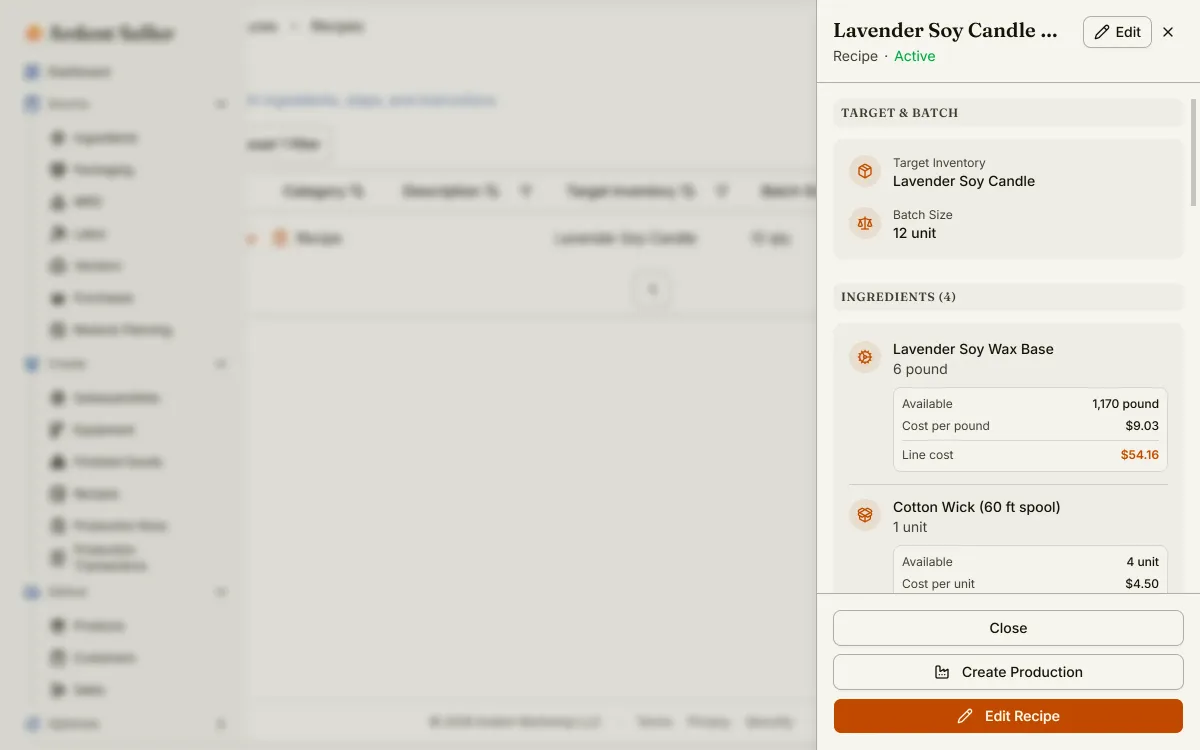
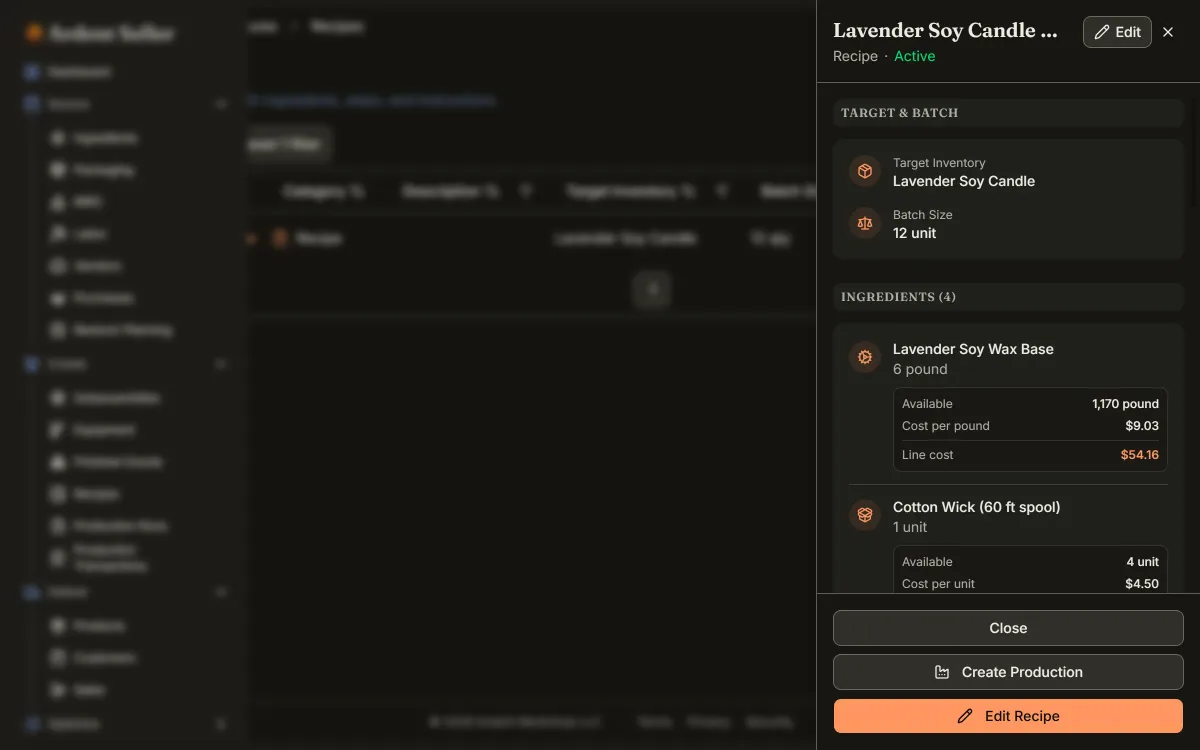
A rough rule of thumb we'd suggest: once you're past roughly 20–30 SKUs, running custom quotes, or selling on more than one channel, dedicated software starts to pay for itself. Ardent Seller fits this directly — track blanks and materials as inventory, auto-generate SKUs across material and size, build each product or custom job with its material, machine-time, and labor cost to see true cost per piece, sync Etsy listings and orders on any plan including the free one (more marketplace channels in development), and account for the machine you bought with equipment depreciation. The Tools section below covers the range from free spreadsheets up.
Two tax items to keep separate: sales tax (collection rules vary by channel and state) and income tax (laser-shop profit goes on Schedule C; quarterly estimated taxes via Form 1040-ES are required once you expect to owe $1,000 or more for the year — see the IRS estimated-taxes guidance (opens in new tab)). The laser, computer, and other larger tools are typically capital purchases you depreciate rather than expense all at once (unless you elect to expense them under Section 179) — track them properly.
Step 8: Market personalized and custom work
Personalized goods sell on emotion and proof — the buyer wants to see their name, their date, their logo on the thing before they trust you with it. You don't need a daily content grind; you need great photos, a smooth personalization flow, and visible proof of past work.
What moves laser-engraved work, in rough order of leverage for a new shop:
- Photography and mockups. Show the engraving crisply, in context, and with realistic personalization. A clean mockup that previews a buyer's text or logo on the product reduces hesitation on custom orders more than any discount.
- A smooth personalization flow. Make it effortless to submit a name, date, or logo and to approve a proof. Friction here is where personalized orders stall; a clear intake and a quick proof turn browsers into buyers.
- Proof of past work. A visible portfolio — Instagram, a gallery on your listings or site, reviews with photos — does the trust-building. Video of the laser running is unusually effective content because the process is mesmerizing.
- Local relationships for B2B. Awards, signage, and promotional work come from relationships, not search. A handful of local leagues, schools, breweries, and event planners can become repeat, higher-ticket clients.
Two things to treat cautiously early: paid ads on thin custom margins (model your cost-per-conversion net of channel fees before spending), and accepting any custom request regardless of fit — unusual one-offs with heavy design time can quietly run at a loss. Start with strong photos, an easy personalization-and-proof flow, process video, and local B2B outreach; they compound and cost almost nothing. And never engrave a logo or licensed design you don't have the rights to, however much the customer wants it (step 2).
The tools section
Tools to consider
A short, honest list — Ardent Seller alongside the other tools most laser engraving business owners end up using.
Track blanks and materials as inventory; auto-generate SKUs across material and size; build each product or custom job with its material, machine-time, and labor cost to see true cost per piece; sync Etsy listings and orders; and account for the machine you bought with equipment depreciation. Etsy sync is included on every plan — even the Free plan — so a one-shop seller can sync listings, orders, and inventory at no cost; paid plans add more connected shops, higher limits, and deeper reporting (more marketplace channels in development).
A widely-used layout, editing, and control software for many CO2 and diode lasers — design or import artwork, arrange jobs, and drive the machine. Buy-once model (Core and Pro tiers) with a free trial; ongoing updates require a paid annual renewal. Check current pricing and your machine's compatibility.
Free, open-source vector design tool — create and clean up the vector artwork that keeps engraving and cutting crisp at any size. A no-cost alternative to Illustrator or Affinity Designer for getting started.
A common first channel for personalized and custom laser goods — built-in marketplace demand for personalization surfaces a new shop quickly. Be aware of the stacked fee load (listing + transaction + payment processing, plus optional Offsite Ads).
Card reader and point-of-sale for selling at markets and fairs and invoicing local B2B clients. Free app; pay per-transaction processing on sales.
Tracks income and expenses for tax purposes, handles the laser and computer as capital purchases, and exports a Schedule C summary at year-end. Pricing changes — see Intuit's pricing page for current rates.
Common mistakes to avoid
The patterns that show up over and over in the first year.
Skimping on ventilation and laser safety
Engraving and cutting release hazardous fumes, lasers are an eye hazard, and an unattended machine is a fire risk. Skipping a proper fume extractor, wavelength-rated safety glasses, or fire precautions to save money is the most dangerous mistake a new operator can make. Treat ventilation, eye protection, and fire safety as required setup costs (step 2).
Putting PVC or unknown plastics in the laser
PVC and vinyl release hydrogen chloride (HCl) gas when lasered — toxic to you and corrosive to the machine. Other unknown plastics can be just as bad. Only cut and engrave materials you've confirmed are laser-safe, and verify a material's composition before testing it (step 2).
Not charging for machine time and design labor
Pricing off the material blank while giving away machine time, tube/diode wear, and the design and setup hours on custom work means selling your most expensive inputs for free. Charge a machine rate that includes wear, bill design and setup time, and allocate machine depreciation into every price (step 5).
Engraving licensed or trademarked designs
Selling products engraved with licensed characters, team logos, or brand marks you don't have rights to is infringement — and a direct route to marketplace takedowns, cease-and-desist letters, and account suspension. Sell your own or properly-licensed designs, and get written permission for a client's logo (step 2).
Letting the variant catalog sprawl untracked
Personalization turns one product into dozens of SKUs across material, size, design, and text. Tracking that in a spreadsheet breaks down fast — you lose sight of what's in stock and what each variant costs. A consistent SKU system (and software that generates it) keeps the catalog manageable as it grows (step 7).
Buying too much machine or material up front
It's easy to over-buy — a bigger laser, a second machine, or a stockpile of exotic blanks before the first sale. Start with the machine your niche needs and a small material buy, prove the work sells, then reinvest revenue into the upgrade that removes your biggest bottleneck (steps 1 and 3).
Frequently asked questions
The questions new makers ask most often.
Do I need a license to start a laser engraving business?
In most U.S. states there's no laser-engraving-specific license — it isn't a regulated product category like food or cosmetics. You'll typically need a general business registration with your state or city and a sales-tax permit if your state has sales tax. Two things to handle that are specific to this trade: laser products are regulated for radiation safety by the FDA under 21 CFR 1040, so buy a machine that's labeled and compliant for its laser class and never defeat its safety interlocks; and engraving designs you don't own the rights to is an intellectual-property risk, so sell your own or licensed artwork and get written permission for a client's logo. Product liability insurance is also worth carrying and is often required by craft fairs and B2B clients.
How much does it cost to start a laser engraving business?
A realistic range is $400 to $6,000 (as of 2026). At the low end, a desktop diode laser plus ventilation, safety gear, and a modest material buy can start a personalized-goods shop for a few hundred dollars. A capable CO2 laser with fume extraction, accessories like a rotary attachment, and software runs toward $6,000, and a fiber laser for metal marking can go higher — $10,000 or more. The smart approach is to buy the machine your niche actually needs, prove the work sells, then reinvest revenue into the upgrade that removes your biggest bottleneck rather than over-buying up front.
Which laser should I buy — diode, CO2, or fiber?
Let your niche decide. A diode laser is the most affordable start and handles wood, leather, slate, and coated metals well — good for personalized goods on a budget. A CO2 laser is the versatile workhorse for engraving and cutting wood, acrylic, leather, glass, and slate, and is the usual choice for a mixed gift, signage, and awards line. A fiber laser specializes in deep, permanent marking on bare metal — pair it with a metal-goods or industrial-marking niche. A CNC router (not a laser) covers thicker, dimensional work a laser can't. Match the machine to the materials your products need before you buy.
Is laser engraving safe to do at home?
It can be, with the right setup — but the risks are real and have to be managed. Laser light can permanently damage your eyes, so keep enclosures and interlocks in place and wear wavelength-rated safety glasses on open-frame machines. Engraving and cutting release hazardous fumes and particulate, so you need a fume extractor or a vent to the outdoors, not just an open window. A running laser can ignite material, so never leave it unattended and keep a fire extinguisher nearby. And never laser PVC, vinyl, or unknown plastics — they release toxic, corrosive hydrogen chloride (HCl) gas. Set up ventilation, eye protection, and fire safety before you start producing.
How do I price laser-engraved products?
Build the price from a complete cost stack, then apply a markup. Add up the material blank and consumables, machine time at a rate that covers power, extraction, and tube/diode wear, the design and setup labor (especially on custom work), and an allocation for machine depreciation and overhead — then, following a rule of thumb common in the handmade-goods community, price wholesale around 2x that total cost and retail around 3–4x. The key is that machine time, wear, and design labor — the costs most new operators leave out — must be in the total before you apply the multiplier. A worked example in step 5 puts a personalized 12-by-9 in. birch sign near $33–$34 cost. Use the laser/CNC job-cost calculator linked in step 5 to model your own.
Can I engrave logos, characters, or brand names onto products I sell?
Not without the rights. Engraving licensed characters, sports-team logos, song lyrics, or company brand marks onto products you sell — without a license — is trademark or copyright infringement, and a direct route to marketplace takedowns, cease-and-desist letters, and account suspension. Sell your own designs, properly-licensed artwork, or genuinely generic motifs. If a client wants their own logo engraved, get written permission confirming they hold the rights. The USPTO's trademark basics (uspto.gov/trademarks) are a useful primer.
What materials can a laser engrave or cut?
It depends on the machine. Diode and CO2 lasers commonly engrave and cut wood and Baltic-birch plywood, cast acrylic, leather, slate, and paper; CO2 also does glass (engrave) well; both can mark coated or anodized metals, or bare metal with a marking spray. Fiber lasers specialize in marking bare metals directly. Crucially, never laser PVC, vinyl, or unknown plastics — they release toxic, corrosive hydrogen chloride (HCl) gas and damage the machine — and confirm any material is laser-safe before testing it. Each material also needs its own power, speed, and pass settings, which you dial in with test grids (step 4).
How long does it take to start selling laser-engraved goods?
Plan on two to eight weeks if you start with a desktop diode or CO2 laser and a focused product line. Most of that time goes to setting up safe ventilation, running material test grids to build a settings library, designing your first products, costing them by machine time plus labor, and shooting photos or mockups. A custom or B2B model (awards, signage, promotional work) ramps more gradually because that pipeline depends on relationships and outreach turning into quoted, deposited jobs. Starting with a small catalog of repeatable personalized goods is the fastest route to a first sale.
Free resources
Hand-picked calculators, checklists, and templates that map directly to the steps above.
Maker-focused per-job pricing for laser engravers and CNC routers. Materials + machine time + labor + design amortization → defensible quote with margin.
Live web version of our Excel pricing calculator. Materials + labor + packaging + platform fees → defensible retail at your target margin, with batch-pricing tiers.
Pick a target hourly rate, enter your materials, hands-on minutes per unit, and platform fees — the calculator returns the minimum price that actually pays you that rate after fees and costs. Maker-business specific, not a "freelance day rate" tool.
A live web tool that runs the +10% / +20% / +30% price-hike math for one product — including the volume drop that comes with each — and tells you which scenario clears the most monthly profit.
A vendor-neutral PDF primer on building a real SKU system — prefix conventions that survive variants and reorders, when barcodes start paying for themselves, free vs. paid barcode options, and a one-page printable cheat sheet for the workbench wall.
Pre-show break-even math, a packing and booth-setup checklist, in-show data to track, and a post-show reconciliation page — one printable per event.
A working Excel line sheet for handmade wholesale — buyer-ready front sheet, per-SKU pricing math behind it, and the formulas already wired in.
A working Excel inventory tracker for makers — raw materials, finished goods, packaging, and a purchase log. Reorder thresholds and a status column do the math; conditional formatting flashes red when you are below the line.
36 things to set up before — and after — your first sale. Inventory, pricing, and the legal essentials in one place.
A printable six-page playbook for handmade-goods producers — five planning principles, the demand-driven batch-sizing formula, and four worksheets for sizing, run logging, weekly WIP, and post-run audit.
A four-page fillable PDF for tracking suppliers — vendor records, an alternate-supplier scoring sheet, and a one-row-per-vendor master index. Type into it in your PDF reader, or print blank copies for the clipboard.
A free, scoped-for-small-sellers economic-nexus checker. Enter your trailing 12-month sales and transactions per state, and the tool flags every state where you have probably crossed the post-Wayfair economic-nexus threshold — without pushing you into a filing product.
Walk through the nine factors of Treasury Regulation §1.183-2(b) and find out whether your side activity qualifies as a for-profit business or a hobby for federal tax purposes — and where to focus to strengthen the business case.
When a spreadsheet is enough, when it stops working, and how to tell the difference before it costs you.
A working Excel worksheet for sellers reconciling Etsy + Shopify + in-person sales against bank deposits — surfaces fee shortfalls, refund mis-postings, and a per-channel monthly P&L.
A working Excel worksheet for self-employed makers — log income, set filing status, and the four quarterly estimated-tax payments calculate themselves. SE tax (15.3%) plus federal income tax math built in, with a safe-harbor escape hatch on its own tab.
A working Excel expense tracker organized by IRS Schedule C category. Drop-down picker on every row, a Monthly Summary that builds itself, a year-end Schedule C view, and a mileage log with the deduction calculated for you.
Read next
Deeper dives on the topics that come up in the guide.
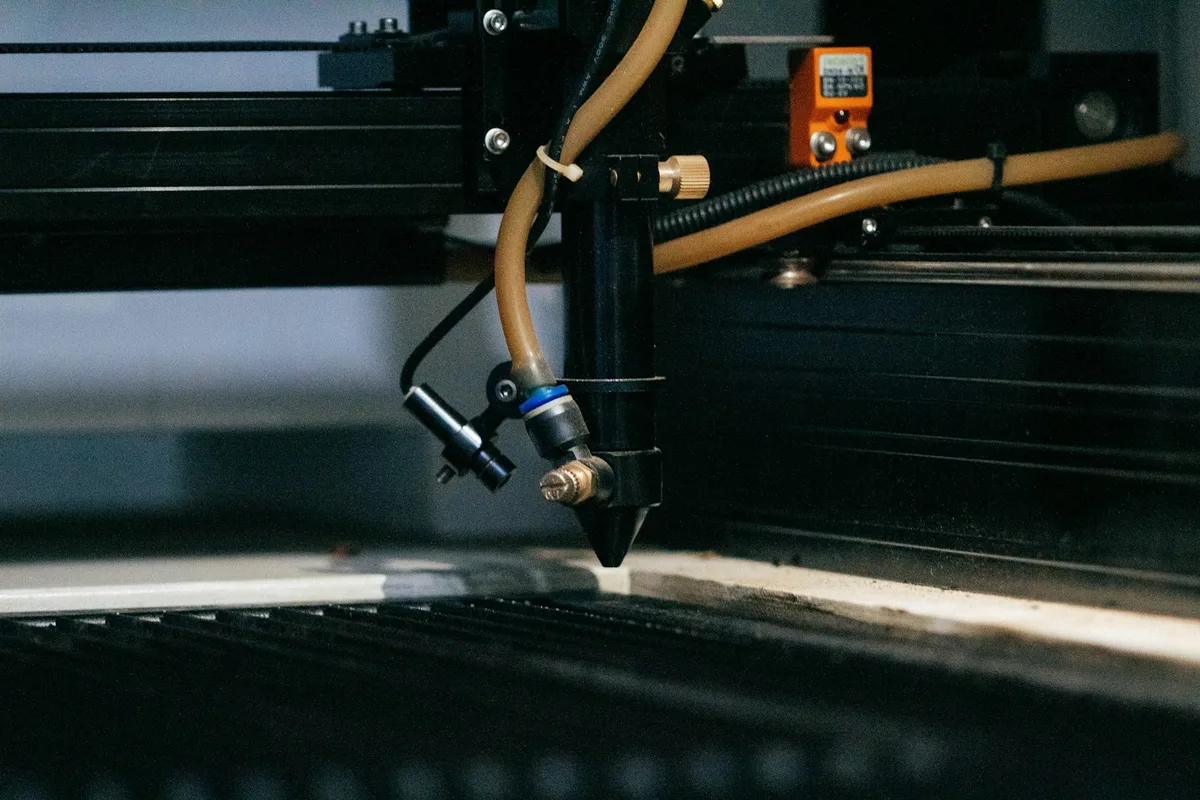
A line-by-line walkthrough of what it actually costs to make a single laser-engraved or CNC-cut product — material, machine-hour cost, labor, design amortization, consumables, packaging, and platform fees — built around an annotated walnut-sign quote with numbered callouts.
Your oven, kiln, mixer, or 3D printer loses value every year — and if you are not accounting for it, you are underpricing your products and overpaying on taxes. Learn how depreciation works and how to use it.
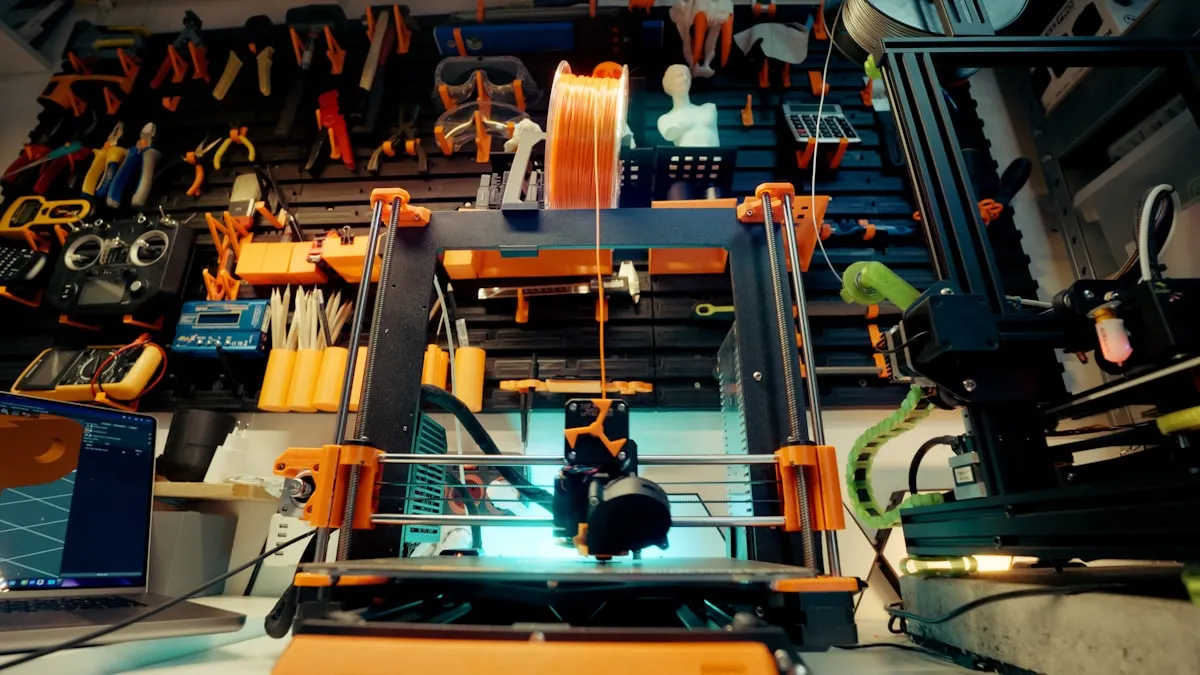
Most 3D printing sellers calculate cost per part by weighing their print and multiplying by the filament price per gram. That often covers less than half of the actual cost — sometimes far less if post-processing labor is involved. Here is how to account for the rest — electricity, wear parts, failed prints, post-processing time, and machine depreciation — so you can price for real profit.
Most craft sellers lose money through poor inventory habits without realizing it. Learn how to build a simple inventory system that eliminates guesswork, prevents stockouts, and scales with your business.
The postage label is the cheap part. Dimensional weight, packaging, label software, free-shipping subsidies, and processor fees on the freight charge all quietly stack up on every order you send. Here is the full cost anatomy of a shipped package, and the tables that show where your margin actually goes.
Once you're selling, you'll need to track it
Tracking inventory, costs, and taxes across every batch and every channel is the operational reality once sales start. Ardent Seller is purpose-built for this.
Laser engravers, CNC operators & personalized gift makers
Ready to start?
Track every batch, recipe, and sale from day one of your laser engraving business. Free plan, no credit card.