How to start a chocolate business
A practical, step-by-step playbook for turning molded bonbons, bars, bark, and truffles into a side income or full business — from confirming your state's cottage food law and which fillings it allows, to tempering reliably and pricing each piece, with the food-safety and labeling details most beginner tutorials skip.
- Startup cost
- $200 – $2,000
- Time to first sale
- 2 – 6 weeks
- Note: Your state's cottage food registration timeline and learning to temper reliably are the variables that stretch it; bean-to-bar is a longer, equipment-heavier path.
- Difficulty
- Moderate
Last reviewed · Rates, fees, and regulatory thresholds in this guide can change — verify the linked sources before acting.
The short version
There are two very different paths into a chocolate business. The common one is being a chocolatier — buying high-quality couverture (pre-made chocolate) and tempering, molding, filling, and finishing it into bonbons, bars, bark, and truffles. The other is bean-to-bar — roasting, cracking, winnowing, grinding, and conching cocoa beans into chocolate from scratch, which needs a melanger and far more equipment and time. Start as a chocolatier. The craft skill that gates everything is tempering: getting cocoa butter into its stable crystal form so the chocolate sets glossy, snaps cleanly, and resists bloom. The legal picture mirrors other cottage foods — shelf-stable confections (molded chocolates, bars, bark, and firm non-perishable centers) are allowed under many states' cottage food laws, but perishable fillings (fresh-cream ganache, fresh fruit, anything needing refrigeration) often fall outside cottage food, and chocolate carries heavy allergen exposure (milk, soy lecithin, tree nuts, peanuts, wheat). Startup runs $200–$2,000 (couverture, molds, a thermometer, and optionally a tempering machine dominate the spend), and the pricing trap is the same as every food craft: couverture, fillings, the box and inserts, plus your labor are easy to under-count on a $20–$40 box of bonbons.
Good fit if…
- You already make chocolates or truffles that friends ask you to make again
- Your state's cottage food law allows the chocolate products you want to sell (most allow shelf-stable confections — verify, especially for cream-filled or perishable items, in the Cottage Food Laws by State reference)
- You have $200–$2,000 of starter capital and a cool, low-humidity space to temper and set chocolate
- You like the idea of holiday gift boxes, farmers markets, local pickup, weddings/events, and (where your state allows it) shipping in cool weather
Probably not for you if…
- You want to ship nationwide year-round from day one — most cottage food laws bar interstate sales, chocolate melts in transit warm months, and wholesale to stores usually needs a commercial kitchen
- You're set on fresh-cream truffles or other perishable centers, which often fall outside cottage food without a licensed kitchen
- You won't invest the practice to temper reliably — untempered chocolate looks dull, streaky, and blooms, and won't sell at gift prices
- You can only work in a hot, humid kitchen with no climate control — chocolate seizes, sweats, and blooms in those conditions
Tip: You don't need a commercial kitchen to start: shelf-stable chocolate (molded chocolates, bars, bark) is one of the friendlier cottage food categories in many states, and starting cheap as a "chocolatier" — buying couverture rather than making it bean-to-bar — keeps the equipment list short. The real skill to master is tempering, and the one legal catch is that perishable fillings change the rules, so Step 1 routes you through the law first.
End-to-end timeline to first sale
Chocolate moves reasonably fast — there's no long ferment or cure, and shelf-stable pieces can be made ahead. The two variables that stretch the calendar are your state's cottage food registration and the practice it takes to temper reliably.
- Confirm law + registerSame-day to 4+ weeks
Look up your state cottage food rules (especially which fillings are allowed), register, and complete any required food-safety course.
- Source + set up~1 week
Buy couverture, molds, a thermometer, tempering tools, and packaging. Set up a cool, dry, low-humidity work area.
- Learn to temper + test a batch1–2 weeks
Practice seeding or tabling until temper is reliable, mold and fill your first assortment, and verify gloss, snap, and release.
- Box + list~1 week
Shoot photos, print compliant labels (ingredients, allergens, net weight, home-kitchen disclaimer), and finalize boxes, assortments, and pricing.
2–6 weeks to first sale
The 8-step playbook
Run these in order. Skipping ahead is the most common reason new makers ship inconsistent product or under-price their work.
Step 1: Confirm your cottage food law allows your chocolate — and choose your path
Shelf-stable chocolate confections are allowed under many cottage food laws, but the rules turn on the filling: perishable centers can push you out of cottage food entirely. Decide chocolatier vs bean-to-bar, and confirm the legal footprint, before sourcing anything.
Starter product types compared
Before committing, compare the cottage food and craft trade-offs below; this step explains the state rules in detail. New makers often reach for fresh-cream truffles first, but shelf-stable molded chocolates and bars are the easiest to make safely and to sell legally.
| Option | Shelf stability | Cottage food fit | Craft difficulty | Main risk |
|---|---|---|---|---|
Molded bonbons & bars (couverture) The classic chocolatier start. | High (shelf-stable) | Allowed in many states | Tempering is the skill | Out-of-temper bloom/dull finish |
Bark, clusters & dipped nuts Simplest tempered products. | High (shelf-stable) | Allowed in many states | Gentle (still needs temper) | Under-pricing the box |
Fresh-cream ganache truffles Perishable center. | Low (often needs refrigeration) | Often outside cottage food; verify | Moderate | Perishable — may need a licensed kitchen |
Bean-to-bar from cocoa beans Make the chocolate itself. | High (shelf-stable bars) | Bars usually allowed; verify | Steep (roast → conch → temper) | Equipment cost and long learning curve |
Cottage food fit varies by state — verify against your jurisdiction in the reference linked above before committing, especially for any filled or fresh product. "Craft difficulty" is a relative ranking among these product types, not an absolute; step 4 covers tempering and the test that tells you it took.
Every U.S. state has a cottage food law that lets individuals sell certain home-made foods without a commercial kitchen, and many include "candy" and shelf-stable chocolate confections on the allowed list — they're low-moisture and shelf-stable, which is what makes them lower-risk. But chocolate has a specific fault line most beginner guides skip: the filling determines whether it's still cottage food.
- What you can sell. Solid molded chocolates, bars, bark, clusters, and chocolates with firm, shelf-stable centers (e.g., certain low-water-activity caramels or fondants, nut and dried-fruit fillings) are allowed in many states. The caveats live in the centers: fresh-cream or butter ganache, fresh fruit, and anything that needs refrigeration is a potentially-hazardous, perishable food in most states' eyes and frequently falls outside cottage food — those typically require a licensed or inspected kitchen. Some states also treat chocolate-dipped fresh produce (e.g., chocolate-covered strawberries) as perishable. See the regulatory callout below.
- Where you can sell. Most cottage food laws allow direct-to-consumer sales (farmers markets, in-person pickup, direct delivery), and many now allow online ordering and intrastate shipping — though chocolate's heat sensitivity makes warm-weather shipping a practical problem regardless of the law. Wholesale to grocery stores or restaurants is typically not permitted under cottage food, and interstate (across state lines) sales almost never are; shipping nationwide generally requires a commercial-kitchen license and FDA food-facility registration.
- Revenue cap. Most states impose an annual gross-revenue cap on cottage food operations — from a few thousand dollars in some states to several hundred thousand in others, with a handful imposing no cap (the exact figure for your state is in the reference linked below). Above the cap you move to a licensed commercial kitchen or an inspected "home processor" tier.
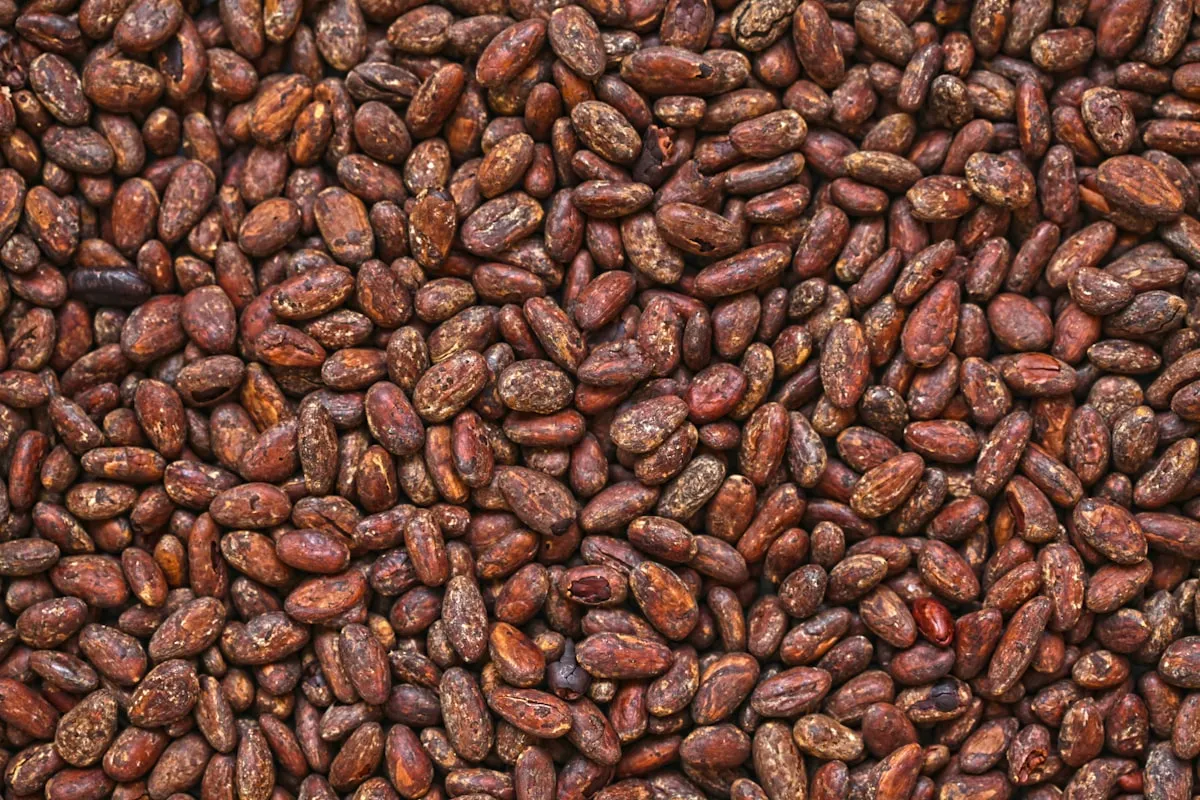
Do this before anything else: look up your jurisdiction in our Cottage Food Laws by State reference — interactive 51-state coverage of revenue cap, sales venues, registration rules, and label requirements — then cross-reference your state's health department, since agencies update cottage food rules periodically and any third-party reference (including ours) is a starting point, not the authority. Confirm that the specific products you want to make (especially anything filled) are allowed before the rest of this guide applies.
Chocolatier vs bean-to-bar. Nearly every new chocolate seller should start as a chocolatier — buying couverture and tempering/molding/filling it — because bean-to-bar adds roasting, cracking, winnowing, and days of grinding/conching on a melanger, plus much more equipment. The comparison table below frames the trade-off; this guide focuses on the chocolatier path, with bean-to-bar noted where it diverges.
Regulatory notice: Perishable fillings can fall outside cottage food
Shelf-stable molded chocolates, bars, and bark are allowed under many cottage food laws. But fresh-cream or butter ganache, fresh-fruit centers, and chocolate-dipped fresh produce are perishable, potentially-hazardous foods in most states and frequently are not permitted under cottage food — they typically require a licensed or inspected kitchen. Water activity and refrigeration needs are what move a filling from "shelf-stable confection" to "perishable." Verify any filled product against your state cottage food law before selling it, and when in doubt, ask your state health department.
Step 2: Register under your cottage food law & set up the business basics
Cottage food registration is its own step beyond the standard business setup (LLC, EIN, sales-tax permit). For shelf-stable chocolate many states are light-touch — often a simple registration with no inspection — but a few require a food-safety course or a kitchen check. Knowing which bucket your state is in sets your timeline.
The cottage food–specific steps (in addition to the general business setup below):
- State or local cottage food registration. Most states require a one-time registration or application before selling. For shelf-stable confections many states are at the lightest-touch tier — a free or low-fee online form with no inspection — because the food-safety risk is low. Some require a fee or a basic food-safety course; a minority require an in-home kitchen inspection. Timelines range from same-day to several weeks. Look up your state in the Cottage Food Laws by State reference for the registration mechanics.
- Food handler card or food safety course. Some states require a food-handler certification before selling. Even where it isn't required, the ServSafe Food Handler course (opens in new tab) is a low-cost (check current pricing at the link), short online course covering safe food handling; StateFoodSafety food-handler certification (opens in new tab) is a recognized alternative in many states — check which your state accepts before paying.
- Required labels and allergen declarations. Every cottage food state requires labels with specific elements: product name, business name and address, net weight, ingredients in descending order of predominance, allergen declaration, and a state-mandated disclaimer like "Made in a Home Kitchen." Chocolate is allergen-dense — milk, soy (from lecithin), tree nuts, peanuts, and wheat are all common — and federal allergen labeling under FALCPA (the Food Allergen Labeling and Consumer Protection Act) applies to every product regardless of state — see the FDA's food-allergen guidance (opens in new tab). See the allergen callout below.
The general business setup (the same as any small business):
- A business structure. Most chocolate makers start as a sole proprietorship (no filing in most states) or form a single-member LLC for liability separation. LLC filing fees vary by state — check your Secretary of State. The SBA's guide to choosing a business structure (opens in new tab) is a good starting point.
- An EIN. Free from the IRS via the EIN application page (opens in new tab), ~10 minutes online. Useful if you form an LLC, sell wholesale (once you scale past cottage food), or want to keep your SSN off vendor forms.
- A state sales-tax permit. Required in every U.S. state with a state sales tax — only Alaska, Delaware, Montana, New Hampshire, and Oregon do not levy one (see the Tax Foundation's state and local sales-tax rates report (opens in new tab) for which states levy a sales tax). Separately, candy is frequently taxed even in states that exempt grocery food, so verify your state's own treatment of confectionery before assuming an exemption. Etsy collects and remits as a marketplace facilitator in most states, but you typically still need a permit to operate as a business.
- Product liability insurance. Food products carry real liability (an undeclared allergen above all). Maker- and food-focused programs are worth comparing — the Food Liability Insurance Program (FLIP) (opens in new tab) is built specifically for food sellers, and general craft-vendor insurers like ACT Insurance (opens in new tab) cover booth and general liability for craft sellers but are not food-specific — confirm a policy actually includes food product liability before relying on it, or stay with a food-focused program like FLIP. Quotes vary by coverage and state, and most farmers markets and any future wholesale buyer will require proof of coverage.
- Required federal labels. Beyond the state cottage-food disclaimer, the federal Fair Packaging and Labeling Act requires the manufacturer/distributor name and address and an accurate net-quantity statement on packaged consumer goods. The FDA administers these rules for food; see the FDA Food Labeling Guide (opens in new tab) (last issued January 2013 — check the FDA site for any newer guidance). Note too that the FDA maintains standards of identity for cacao products (21 CFR Part 163) (opens in new tab) that define what may legally be called "chocolate," "milk chocolate," etc. — relevant if you make claims about your product.
Two things people over-do at this stage: forming an LLC before having any sales (start as a sole prop, upgrade later), and printing a big run of boxes and labels before the product lineup and net weights are locked (you'll redesign once you finalize the assortment).
Regulatory notice: Allergen labeling (FALCPA) applies to every box, in every state
Regardless of your state cottage food rules, federal law requires major food allergens to be declared on the label. Chocolate is allergen-dense: milk, soy (most chocolate contains soy lecithin), tree nuts, peanuts, and wheat are all common, and shared equipment makes cross-contact a real risk. Include a full ingredient list in descending order of predominance, declare the major allergens, disclose shared-equipment cross-contact, and add the state-required "made in a home kitchen" disclaimer — check your state cottage food page for the exact wording.
Step 3: Buy starter equipment & supplies
Chocolatier equipment is modest — couverture, molds, a reliable thermometer, and tempering supplies are the core. A tempering machine is the one optional bigger purchase that earns its place once volume grows; bean-to-bar needs far more.
A workable starter kit for a chocolatier making molded bonbons, bars, and bark:
- Couverture chocolate (high-cocoa-butter coverage chocolate that tempers and flows well — common brands include Callebaut, Valrhona, Guittard): the dominant material cost. Buy in callets/pistoles by the bag; cheaper per pound in bulk. Budget $15–$40+ per kg depending on brand and cacao percentage.
- Polycarbonate molds (for glossy molded bonbons and bars — far better release and shine than silicone): $10–$30 each; start with two or three shapes.
- A reliable digital thermometer (instant-read or infrared; tempering lives or dies on a couple of degrees): $15–$40.
- Tempering surface and tools — a marble slab or a clean stainless surface for tabling, a bench scraper, offset spatula, and a heat gun or hair dryer for touch-ups: $30–$80 if you don't have them.
- Double boiler or a microwave-safe bowl for melting (keep water away from the chocolate — see step 4): $0–$30.
- Dipping forks, transfer sheets, and cocoa butter colors for finishing and decoration (optional but they lift perceived value): $20–$60.
- Digital scale (0.1 g resolution for colors and additions, plus a larger range for couverture): $20–$40.
- Packaging — gift boxes, dividers/inserts, cello bags, and food-safe labels sized for your assortment: $0.50–$3 per unit; cheaper per box in bulk. See step 2 for the required label content.
- Optional: a tabletop tempering machine or melter ($150–$1,000+) — holds chocolate in temper for hours so you can mold continuously instead of re-tempering by hand. A real time-saver once you're producing regularly, but not required to start; many makers hand-temper (seeding or tabling) for the first months.
Total starter outlay: typically $200–$600 for a hand-tempering chocolatier setup plus your first couverture buy; more if you add a tempering machine up front. Bean-to-bar is a different budget — a melanger ($200–$800+), a roaster or modified oven, and a cracker/winnower push it well higher, on top of a long learning curve.
Buy for your first assortment, not your dream catalog. A common mistake is stockpiling exotic single-origin couverture and a dozen molds before knowing what sells. Start with one or two couvertures and a few molds, prove the assortment, then reinvest. Couverture is much cheaper by the case, so scale the order once a recipe and channel are proven — and store it cool, dry, and sealed (chocolate picks up odors and blooms with temperature swings).
Step 4: Master tempering and a repeatable process
Tempering is the craft skill that gates a chocolate business. Cocoa butter can set in several crystal forms, and only one — the stable "beta" crystal — gives the gloss, snap, and bloom resistance customers expect. Learn to temper reliably and check it before you build a catalog.
Why tempering matters. Cocoa butter is polymorphic — it can crystallize into several forms, but only Form V (the stable beta crystal) produces chocolate that's glossy, snaps cleanly, releases from molds, and resists fat bloom (the dull, streaky, grayish film that appears when unstable crystals or temperature swings let fat migrate to the surface). Out-of-temper chocolate looks dull and homemade and won't command gift prices, so this is a business skill, not just a quality nicety.
How to temper (two common methods)
- Seeding. Melt couverture fully (dark to roughly 104–115 °F (40–46 °C); milk and white lower, and never overheated), then add finely chopped tempered chocolate or callets as "seed" and stir as it cools to working temperature (dark roughly 88–90 °F (31–32 °C); milk and white a couple degrees lower). The seed crystals direct the melt into Form V. The most beginner-friendly method.
- Tabling. Pour two-thirds of the melted chocolate onto a marble slab and work it with a scraper until it cools and thickens, then return it to the bowl to bring the batch into temper. Faster but messier and harder to learn.
Exact temperatures depend on the specific chocolate — milk and white chocolate temper a few degrees cooler than dark because of their milk solids — so follow the manufacturer's working-temperature chart for the couverture you bought. A tempering machine automates the hold; by hand you'll re-warm gently to keep the working temperature as you mold.
Test the temper, every batch
- The smear test. Dip a knife tip or spread a thin smear on parchment and let it sit at cool room temperature for a few minutes — well-tempered chocolate sets within minutes, glossy and firm with no streaks. If it's dull, soft, or streaky, it's out of temper; re-temper before molding.
- Mold release and snap. Properly tempered molded chocolate contracts slightly as it sets and releases cleanly from a polycarbonate mold, and a finished piece snaps rather than bends. Poor release or a bendy, matte finish means the temper failed.
- Keep water out. A single drop of water (or steam from a too-hot double boiler) makes chocolate "seize" into a grainy paste. Keep all equipment bone-dry and don't cover warm chocolate with a lid that drips condensation.
Fillings, shelf life, and storage
- Match the filling to your legal footprint. Shelf-stable centers (firm caramels, praline/nut, certain fondants) keep your product within cottage food in many states; fresh-cream ganache and fresh fruit are perishable and often outside it (step 1). Lower-water-activity fillings keep longer; know which side of the line each product sits on.
- Store and sell cool and dry. Chocolate blooms and sweats with heat and humidity. Set a best-by window appropriate to the product, store sealed and away from strong odors, and avoid shipping in warm months without insulation and cold packs.
Keep a batch log: couverture brand and percentage, melt and working temperatures, seed amount, ambient conditions, mold/finish, pieces produced, and a temper-test note. This is your recipe library and the traceability record (lot codes and best-by dates) you'll need if a batch ever has to be pulled — covered in step 7.
Safety warning: Allergen cross-contact and perishable fillings are the real risks
Chocolate's food-safety risk is less about the chocolate itself (low moisture, shelf-stable) and more about two things: undeclared allergens and perishable fillings. Clean equipment between allergen-containing runs (nuts, milk, wheat) and declare cross-contact, because an undeclared allergen is the most likely way a confection harms someone. And treat any fresh-cream, butter-ganache, or fresh-fruit center as perishable — refrigerate it, give it a short shelf life, and confirm your state even allows it under cottage food before selling.
Step 5: Price your boxes and bars to actually make money
A box of bonbons sells for $20–$40 and a bar for $6–$12, which makes it easy to under-price: couverture, the filling, the box and inserts, and your labor each get under-counted unless you run the math explicitly. This step makes it explicit.
A widely used maker rule of thumb — the "keystone" markup — sets wholesale at 2× cost and direct retail at 2× wholesale (≈ 4× cost). It's a useful starting frame, but the worked example below shows where it bends for labor-heavy confections, so you can price from your own numbers rather than take the multiplier on faith:
Stated as formulas: wholesale price = (materials + labor + overhead) × 2, and direct retail price = wholesale × 2 (≈ 4× cost).
That full 4× target works cleanly when materials dominate and labor is light. The more labor a product carries, the harder the full 4× becomes once you sell direct, because the market sets a ceiling on what a box or bar can fetch. Boxed bonbons are labor-heavy, so the example below lands closer to 2× true cost sold direct; simpler, lower-labor items like plain bars and bark sit nearer the full 3–4×. And if wholesale is ever in your plan, you need enough retail headroom for a buyer (a gift shop, a coffee roaster) to mark you up — another reason to keep true cost down.
What "materials" actually includes for a single molded bonbon. The numbers below are illustrative mid-range estimates as of mid-2026 — based on couverture pricing for major brands (Callebaut/Valrhona/Guittard) at small-batch order quantities plus typical gift-box packaging — and your actual figures vary substantially by couverture brand, filling, and box format. The big swings are the couverture (driven by cacao percentage and brand) and the packaging allocated per piece.
- Couverture shell + filling (per piece, ~12–15 g): ~$0.45 (varies widely by brand/percentage)
- Cocoa butter color / decoration: ~$0.10
- Box, divider/insert, and label (allocated per piece in a 9-piece box): ~$0.55
- Energy and tempering loss/waste: ~$0.10
- True material cost per piece (illustrative): ~$1.20
So a 9-piece box carries roughly $10–$11 of materials before labor — which is why, in this example, a $15 box loses money once your time is counted.
What "labor" includes: tempering, molding or dipping, making and piping fillings, capping and unmolding, decorating, boxing, and cleanup (chocolate work is cleanup-heavy). As an editorial estimate — based on hand-tempering and filling 30–40 pieces by the seeding method in a home kitchen — a batch of a few dozen bonbons commonly runs 60–120 minutes of active labor; allow more while you're still learning to temper. A reasonable starting reference for the hourly rate is roughly $20–$25/hr: the BLS Occupational Employment and Wage Statistics (opens in new tab) table for "Craft Artists" (SOC 27-1012) puts the median hourly wage in that band — check the current figure at the link, since BLS updates the page in place each release. That occupation is a broad proxy, not chocolatiers specifically — use it as a floor so your pricing doesn't assume you work for free, then adjust with the Hourly Rate Pricing Calculator below. Spread over a batch, labor often adds several dollars per box — frequently the largest single cost, and the one most beginners forget.
Overhead (your fixed costs not tied to a single box): electricity beyond the per-piece line, kitchen and cool storage, insurance, market or platform fees, and packaging not in the per-unit cost. A workable starting heuristic is roughly 10–20% of materials + labor until you have real expense data.
Put it together for a 9-piece box. The bottom line: a box with a true cost around $16–$18 needs roughly $32–$36 at direct retail to be comfortably profitable — which is why a $15 box loses money once labor is counted. Here's how that true cost builds: materials run ~$10–$11; add ~$4–$5 of labor (about 12 minutes of batch time allocated to this box at the $20–$25/hr rate above) and ~$2 of overhead. The $32–$36 works out to roughly 2× true cost — short of the full 4× keystone, because in practice the market for a 9-piece artisan box tops out around $30–$40 (an editorial observation from typical farmers-market, Etsy, and direct-order pricing), so 4× simply won't clear once labor is honestly counted. That's normal for labor-heavy handmade confections: sell direct at about 2× true cost, protect margin by keeping that cost down (efficient batching, right-sized packaging) and lifting order value with assortments and gifting, and reserve the full 2×-wholesale/2×-retail math for lower-labor lines.
Bars behave differently — lower labor off a lower base — so a bar costing $2–$3 to make lands around $7–$12 retail (closer to the full 3–4×). Holiday gift assortments and corporate/wedding orders are the most reliable way to lift the average order value above a single box.
The pricing calculators below run this math for you — plug in your own couverture cost, batch yield, and labor time.
Step 6: Choose where to sell
Chocolate is a gift and occasion product — it sells in boxes, around holidays, and at events. Your channels are shaped by cottage food law (which limits where and how far you can sell) and by chocolate's heat sensitivity (which limits warm-weather shipping).
The most common starting channels for chocolate makers, shaped by what cottage food allows:
- Farmers markets & craft fairs — strong for chocolate, especially in cooler months and around holidays. You keep all the margin minus the booth fee, samples convert well (check your market's sampling rules and any required permits), and gift boxes move. Booth fees vary widely by market and region — model break-even against your per-box margin from step 5, and watch the heat: a hot market day can ruin tempered chocolate, so plan shade, coolers, or cooler-season shows.
- Direct local sales & pickup — allowed in essentially every cottage food state: local delivery, pickup, and word-of-mouth orders. The lowest-friction, highest-margin channel, and it sidesteps the shipping-heat problem entirely.
- Holiday, wedding & corporate gifting — chocolate's highest-value channel. Wedding favors, corporate gift boxes, and seasonal assortments (Valentine's, Christmas, Mother's Day) carry larger order values and pre-orders that let you batch efficiently. Often the most profitable lane for a home chocolate business.
- Online ordering & intrastate shipping — many states now allow cottage food producers to take online orders and ship within the state. Etsy and your own store both work where your state permits it — but confirm your state allows shipping, ship only in cooler weather or with insulation and cold packs, and remember interstate shipping is almost never permitted under cottage food. If you sell on Etsy, model the stacked fees (listing + transaction + payment processing, plus optional offsite ads — see Etsy's Fees and Payments Policy (opens in new tab)); they bite harder on a single bar than on a gift box, so lead with boxes and assortments. The full worked fee breakdown is in our Etsy fees FAQ.
- Wholesale & retail — the commercial-kitchen line. Selling wholesale to cafés, gift shops, or across state lines almost always requires moving out of cottage food into a licensed commercial or commissary kitchen and registering as an FDA food facility. This is the natural "graduation" once you hit your state's revenue cap — plan for it, but it's typically phase two, not your starting channel.
A common opening combination is farmers markets plus local pickup, adding holiday and event gifting (which is where chocolate margins are best), then intrastate online orders once you know which products sell. Pick one channel, run it for a few weeks, then layer the next.
Whichever channels you choose, you'll need to track inventory, batch lot codes, and best-by dates across all of them — both to manage seasonal stock and to pull a recall list if a batch ever has to come off the shelf. That's the operational problem step 7 solves.
Regulatory notice: Cottage food online sales are almost always intrastate only
Many states let cottage food producers take online orders and ship within the state, but shipping across state lines is almost never permitted under any state's cottage food law — it generally requires a licensed commercial or commissary kitchen and FDA food-facility registration. Confirm your state allows shipping at all before you list, and treat a national Etsy or web listing as something to set up only once you've verified the legal footprint.
Step 7: Track inventory, batches, lots, and taxes from day one
Once you have a tempering process and a place to sell, the operational reality kicks in — what couverture and packaging are left, how many of each piece are in stock, which lot is which, what's approaching best-by, where you stand against your state's revenue cap, and what you owe in taxes.
For the first several batches a notebook or spreadsheet is genuinely fine. The volume is low and you remember everything.
Past that point the math gets brittle. Common breakdowns:
- You buy couverture by the kilo and boxes by the case but sell by the piece and the box — manual unit conversions drift.
- Couverture prices move with the cocoa market and your box price doesn't, because nobody recalculated true cost.
- An assortment becomes many SKUs (flavors × box sizes × seasons) and a spreadsheet stops tracking what's in stock across channels.
- A customer (or, if you scale to wholesale, an inspector) asks which lot a piece came from and you can't trace it to its batch — which matters most for allergen recalls.
- You're approaching your state's cottage food revenue cap and don't realize it until you've blown past it.
- Tax time arrives and you can't tell the IRS what you paid for the couverture and packaging that went into the chocolate you sold.
This is an editorial observation, not a hard threshold — your breaking point depends on your tracking habits — but spreadsheet workflows tend to get brittle once you're juggling several products, a moving couverture cost, lot codes, allergen traceability, and a revenue cap to watch. That's typically when a dedicated tool starts to pay for itself: lot-and-expiry tracking for traceability, true cost-per-box that updates when couverture prices move, and a running view of sales against your cap. The free tools below — including the Inventory Tracker Starter Kit, a revenue-cap tracker, and a Spreadsheet vs Inventory Software Decision Guide — help you judge when to make the switch.
Step 8: Market without burning out
Chocolate sells on craving and gifting — a glossy photo and a sample do more than any ad. You don't need a content treadmill; you need a few great photos, a sampling habit, and a way for happy customers to reorder and gift.
Strong photography still matters, especially if you sell online where your state allows it. Etsy is visual-first — search results show photos before titles — and Etsy's own Etsy Seller Handbook photography section (opens in new tab) has a deep library. For chocolate, gloss and finish are the whole sell, so treat lead-photo quality as a competitive lever, not a polish item.
What works for chocolate photography:
- Natural light from a window, never overhead kitchen lighting — gloss reads as quality
- A neutral surface (slate, marble, linen) that makes the sheen and color pop
- A cross-section or a piece with a bite taken, so buyers see the filling and the snap
- An open gift box shot, since boxes and assortments lift the order value
- Seasonal/occasion styling (ribbon, a place setting) for the holiday and wedding lanes
Beyond photos, the two highest-leverage activities are:
- Sampling at markets. Tasting is the single best sales tool chocolate has — a sample converts far better than a label. Follow your market's sampling rules (some require a permit or specific serving setup), and pair samples with a "which would you gift?" question to learn which products to scale into assortments.
- Email list, occasions, and repeat customers. Chocolate is a consumable and a giftable — buyers come back and they buy for occasions. Capture emails at every market with a "10% off your next order" card, and send a short note ahead of Valentine's, Mother's Day, and the December holidays when gift demand peaks. The downside risk is near zero even if uplift is modest.
Treat paid ads cautiously in the first six months — the per-box price point makes ad ROI tight until your photography and bestseller mix are working, and gift assortments and corporate orders are where spend pays off first. Start with sampling and the email habit; both compound and cost almost nothing.
The next sections cover tools at every stage (Tools to consider), the patterns that trip up new makers (Common mistakes to avoid), and the questions beginners ask most (Frequently asked questions).
The tools section
Tools to consider
A short, honest list — Ardent Seller alongside the other tools most chocolate business owners end up using.
Track couverture, cocoa butter colors, fillings, boxes, inserts, and labels as inventory; store each recipe as a scalable procedure so a test batch becomes a market run in one click; assign lot codes and best-by dates for traceability and allergen recalls; see true cost per piece and per box including packaging and labor; and watch sales against your state's cottage food revenue cap. The Free plan covers a small line and includes one connected Etsy shop; paid plans raise the limits and add more shops and advanced reporting.
Brands like Callebaut, Valrhona, and Guittard publish the melt and working temperatures for tempering each of their chocolates — the authoritative reference for the couverture you actually buy. The exact figures are on the bag and the maker's site; search "[brand] tempering guide" for the chart that matches your chocolate. Free.
Standard for tracking income and expenses for tax purposes. Categorizes purchases automatically and exports a Schedule C summary at year-end. Pricing changes — see Intuit's pricing page for current rates.
Free design tool for box labels, gift tags, and listing graphics. Templates map cleanly to the required cottage-food label elements (ingredients, allergens, net weight, home-kitchen disclaimer).
Free POS app for in-person sales at markets and events. Handles card payments, basic inventory, and email-receipt capture for building your list.
A marketplace option where your state allows cottage food shipping — strong for gift boxes and assortments. Be aware of the stacked fee load (listing + transaction + payment processing, plus optional offsite ads) which bites harder on a single bar — review Etsy's current fees before listing — and ship chocolate only in cooler weather or with insulation.
Common mistakes to avoid
The patterns that show up over and over in the first year.
Assuming every filling is cottage-food legal
Shelf-stable molded chocolates, bars, and bark are allowed under many cottage food laws, but fresh-cream ganache, fresh-fruit centers, and chocolate-dipped fresh produce are perishable and frequently are not — they often require a licensed kitchen. Confirm each filled product against your state's cottage food law before selling it, and ask your health department when a filling is borderline.
Selling out-of-temper chocolate
Untempered chocolate is dull, soft, streaky, and blooms — it looks homemade and won't hold gift prices. Tempering is the core craft skill: learn to seed or table reliably, test the temper with a smear and a snap before molding a whole batch, and keep water away so the chocolate doesn't seize.
Under-declaring allergens
Chocolate routinely contains milk, soy (lecithin), tree nuts, peanuts, and wheat, and shared equipment creates cross-contact. An undeclared allergen is the most likely way a confection harms a customer and the fastest route to liability. Declare every major allergen and shared-equipment cross-contact on the label, in every state.
Pricing a box like the candy aisle
Mass-produced chocolate has near-zero labor cost; yours doesn't. A $15 nine-piece box usually loses money once couverture, fillings, the box and inserts, and your tempering-and-molding time are counted. Price a labor-heavy box at roughly 2× true cost (often $32–$36 for a nine-piece box once labor is counted; simpler low-labor items like plain bars sit nearer 3–4×) and lean on gift assortments and occasion orders to lift the average order value.
Shipping chocolate in the heat
Chocolate melts and blooms in transit during warm months. Shipping a box without insulation and cold packs in summer arrives as a ruined, bloomed mess and a refund. Ship only in cooler weather, use insulation and cold packs when you must ship warm, set clear warm-weather shipping policies, and lean on local pickup in summer.
No lot codes or best-by dates
Without a lot code on every box and a record of which batch it came from, you can't pull a targeted recall if a batch has an allergen or quality problem, and you can't practice first-in-first-out selling. Assign a lot code and best-by date to every batch from box one — it's trivial early and impossible to reconstruct later.
Frequently asked questions
The questions new makers ask most often.
Do I need a license to sell homemade chocolate?
In most U.S. states you don't need a full food-business license to sell shelf-stable chocolate confections — molded chocolates, bars, and bark are allowed under many states' cottage food laws, often with just a simple registration and no inspection. The important caveat is fillings: fresh-cream ganache, fresh fruit, and other perishable centers frequently fall outside cottage food and can require a licensed kitchen. You'll typically also need a general business registration, a sales-tax permit (candy is often taxed even where grocery food isn't), and compliant labels including a full allergen declaration and a state-mandated "made in a home kitchen" disclaimer. Look up your state in the Cottage Food Laws by State reference, then confirm with your state health department, since agencies update rules periodically.
How much does it cost to start a chocolate business?
A realistic starter outlay is $200–$2,000 for a chocolatier (someone who buys couverture and tempers/molds/fills it). The minimum to produce a first assortment is around $200–$600 for couverture, a few polycarbonate molds, a reliable thermometer, tempering tools, and packaging — you can hand-temper at first and skip the machine. Adding a tabletop tempering machine ($150–$1,000+) raises that but saves real time once you produce regularly. Bean-to-bar — making chocolate from cocoa beans — is a different budget entirely because of the melanger, roaster, and winnower. Many makers start lean and reinvest revenue into a tempering machine and more molds.
Should I start as a chocolatier or make bean-to-bar chocolate?
Almost everyone should start as a chocolatier. A chocolatier buys high-quality couverture (pre-made chocolate) and focuses on tempering, molding, filling, and finishing — far less equipment, a faster learning curve, and a quicker first sale. Bean-to-bar means making the chocolate itself from cocoa beans: roasting, cracking, winnowing, and grinding/conching for days on a melanger, which adds significant equipment cost and a steep learning curve. Bean-to-bar can be a wonderful craft and a premium product, but it's a much bigger commitment — start as a chocolatier, prove the business, and move to bean-to-bar later if it calls to you.
Why does my chocolate look dull, streaky, or grayish (bloom)?
That's almost always a tempering or storage problem. Cocoa butter sets in several crystal forms, and only the stable beta crystal gives gloss, snap, and bloom resistance — chocolate that wasn't tempered into that form sets dull and streaky. Fat bloom (a grayish film) also appears when finished chocolate is stored too warm or through temperature swings, letting fat migrate to the surface; sugar bloom comes from moisture. The fixes: temper properly (seed or table to the right working temperature for your specific chocolate and test it before molding), keep water away so the chocolate doesn't seize, and store and sell cool, dry, and sealed.
Can I sell chocolate online or ship it across state lines?
It depends on your state's cottage food law and on the weather. Many states now allow cottage food producers to take online orders and ship within the state (intrastate); some still limit you to in-person direct sales. Interstate shipping — across state lines — is almost never permitted under cottage food; doing it legally generally requires a licensed commercial kitchen and FDA food-facility registration. On top of the legal limits, chocolate is heat-sensitive: shipping in warm months without insulation and cold packs arrives melted and bloomed. Confirm what your state allows in the Cottage Food Laws by State reference, and ship only in cool conditions or with proper insulation.
How should I price homemade chocolate?
Start from true cost: materials (couverture and filling, cocoa butter colors, and the box, inserts, and label allocated per piece — often around $1.20 a bonbon, so roughly $10–$11 of materials in a nine-piece box) plus labor (tempering, molding, filling, decorating, boxing, and cleanup — frequently the largest cost) plus overhead (energy, cool storage, insurance, fees). For a labor-heavy box that lands a true cost around $16–$18, a $32–$36 direct retail price is roughly 2× true cost — comfortably profitable, which is why a $15 box loses money. The classic keystone framework (wholesale at 2× cost, direct retail at 2× wholesale, ≈4× cost) is the target for low-labor, materials-dominant products; labor-heavy boxed chocolate sold direct typically lands nearer 2× true cost, while simpler items like plain bars sit closer to the full 3–4×. Gift assortments and occasion/corporate orders are the most reliable way to lift the average order above a single box. The pricing calculators on Ardent Seller run this for your own couverture cost, yield, and labor time.
How long does it take to start selling chocolate?
Plan on 2–6 weeks. The two variables that stretch it are your state's cottage food registration timeline (some same-day online forms, a few requiring an inspection that takes weeks) and the practice it takes to temper reliably — the making itself is fast since there's no long cure. Most of the calendar is registration, a short window of tempering practice and recipe testing, and then photos and listings. Starting with simple shelf-stable products (bark, clusters, molded bars) is the fastest route to a first sale; complex filled bonbons and assortments come once your temper is dependable.
Is homemade chocolate safe to sell — do I need to worry about food poisoning?
Plain chocolate itself is low-risk: it's low-moisture and shelf-stable, which is why shelf-stable confections are allowed under many cottage food laws. The two real risks are allergens and perishable fillings. Chocolate commonly contains milk, soy (lecithin), tree nuts, peanuts, and wheat, and shared equipment causes cross-contact — an undeclared allergen is the most likely way a confection harms someone, so declare every major allergen and cross-contact on the label. The second risk is perishable centers: fresh-cream ganache and fresh fruit need refrigeration, have a short shelf life, and often fall outside cottage food entirely. Stick to shelf-stable products, label allergens rigorously, and verify any fresh filling against your state's rules before selling it.
Free resources
Hand-picked calculators, checklists, and templates that map directly to the steps above.
A working Excel recipe scaler — enter a base recipe, set a target yield, and every ingredient auto-scales with unit conversions (oz/g/lb/ml/cups). Plus a batch-cost tab and a unit-conversion reference.
A working Excel pricing calculator — materials, labor, packaging, and platform fees in, a defensible retail price out. Plus a batch tab that shows what 50 vs. 10 actually costs.
Pick your state, enter year-to-date gross sales, and see in real time how close you are to the cap that turns a cottage food operation into a regulated food business. Covers all 50 states + DC.
A printable six-page playbook for handmade-goods producers — five planning principles, the demand-driven batch-sizing formula, and four worksheets for sizing, run logging, weekly WIP, and post-run audit.
Three sections, one page. Print, count, and reconcile raw materials, finished goods, and packaging — with expected, actual, and variance columns.
Pick a target hourly rate, enter your materials, hands-on minutes per unit, and platform fees — the calculator returns the minimum price that actually pays you that rate after fees and costs. Maker-business specific, not a "freelance day rate" tool.
36 things to set up before — and after — your first sale. Inventory, pricing, and the legal essentials in one place.
A working Excel inventory tracker for makers — raw materials, finished goods, packaging, and a purchase log. Reorder thresholds and a status column do the math; conditional formatting flashes red when you are below the line.
A free, scoped-for-small-sellers economic-nexus checker. Enter your trailing 12-month sales and transactions per state, and the tool flags every state where you have probably crossed the post-Wayfair economic-nexus threshold — without pushing you into a filing product.
Live web version of our Excel pricing calculator. Materials + labor + packaging + platform fees → defensible retail at your target margin, with batch-pricing tiers.
Read next
Deeper dives on the topics that come up in the guide.
A primer-by-Q&A for small-batch bean-to-bar chocolate makers — 22 questions on sourcing, yield math, tempering, FDA labels, and pricing, with primary-source citations.
Learn how to calculate the real cost of every product you make — from raw ingredients to labor and overhead — so you can price with confidence and protect your profit margins.
Batch tracking protects your food business from recall disasters, builds customer trust, and keeps you ahead of tightening regulations. Learn how to set up a simple lot tracking system that works.
You bought it. You made it. But it never sold. Spoilage, expiration, and shrinkage silently eat your margins — here is how to track every ounce of inventory that disappears before it reaches a customer.
COGS is the single number that quietly decides whether your maker business is profitable, what your taxes look like, and which products are worth keeping in the catalog. Here is what it actually means, what goes in (and what stays out), and how to start tracking it this week — without an accounting degree.
Once you're selling, you'll need to track it
Tracking inventory, costs, and taxes across every batch and every channel is the operational reality once sales start. Ardent Seller is purpose-built for this.
Bean-to-bar chocolatiers, truffle makers & candy artisans
Ready to start?
Track every batch, recipe, and sale from day one of your chocolate business. Free plan, no credit card.