A customer emails you about a dining table. White oak, live edge, hairpin legs, seats six. She found something similar on Etsy for $1,800 and wants to know your price. You open a browser tab to check white oak prices, scribble some numbers on the back of an envelope, add what feels like a reasonable labor charge, and reply: $2,200.
She says yes. You order the slab. You spend 40 hours over three weekends milling, joining, sanding, and finishing. You buy new router bits because yours were dull. You burn through a quart of finish and half a bottle of wood glue. The hairpin legs cost more than you remembered. And when you deliver the table, you realize you forgot to account for the 30% of that slab that ended up as offcuts, sawdust, and the warped section you cut around.
Your actual material cost was $940. Your actual time was 40 hours. At $2,200 minus materials, you made $1,260 for 40 hours of skilled labor — $31.50 an hour before shop overhead, electricity, tool wear, and the gas to deliver it. You could have earned more driving for a rideshare service.
This is what happens when you price from gut feel instead of data. Fix the data, and you fix the pricing. Here is how, step by step.
Step 1: Track every lumber purchase by species, grade, and actual board foot cost
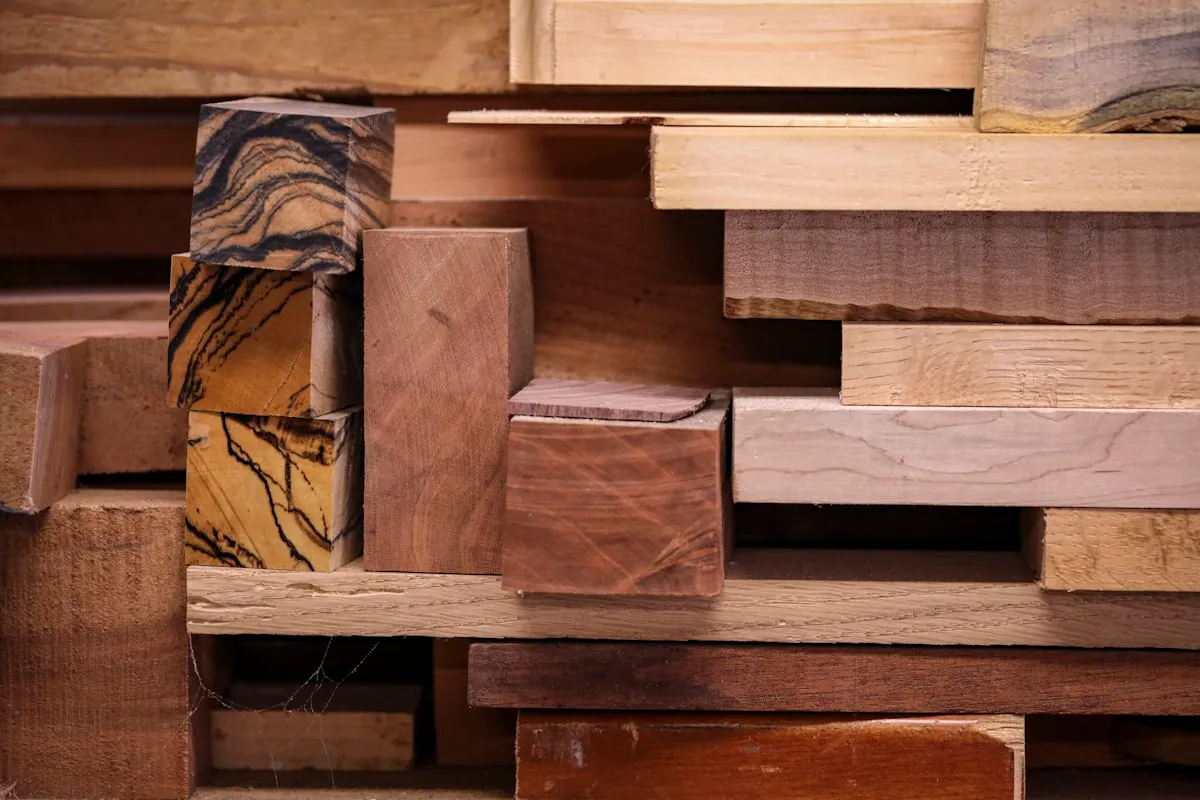
Most woodworkers remember roughly what they paid for wood. Roughly is the problem. Lumber pricing varies by species, grade, thickness, and where you buy it. A board foot of 4/4 hard maple from a local sawmill might run $4.50. The same species from a specialty hardwood dealer could be $7.80. If you mix purchases and average them in your head, you are working with a number that is wrong for every individual board.
Set up a lumber log with these fields for every purchase:
- Date of purchase
- Supplier name
- Species (e.g., white oak, walnut, hard maple)
- Grade (FAS, #1 Common, #2 Common, or ungraded for sawmill wood) (NHLA grading rules)
- Thickness (4/4, 5/4, 6/4, 8/4, etc.)
- Board feet purchased (calculate from dimensions if the seller doesn't provide it)
- Total cost including tax and delivery
- Cost per board foot (total / board feet)
The board foot calculation: (length in inches x width in inches x thickness in inches) / 144. For rough lumber sold by the board foot, the seller usually provides this. For dimensioned lumber from a big box store, you will need to calculate it yourself — a 2x4x8 from a home center is 5.33 board feet, not 8.
Do this now: Pull up your last three lumber receipts. Calculate the actual cost per board foot for each species you bought. If the numbers surprise you, that is exactly why you need to track this.
Once you have a purchase log, every project starts with real numbers instead of guesses. When you pull walnut from your rack for a cutting board, you know that specific walnut cost $9.20 per board foot — not "somewhere around eight or nine dollars."
Step 2: Measure cutting yield, not just material input
Here is where most woodworkers lose money without realizing it. You buy 20 board feet of cherry for a set of shelves. The project requires 14 board feet of finished material. Simple math says you have 6 board feet left over. Except you don't — because the journey from rough lumber to finished piece is a lossy process.
Where your wood goes:
- Planing loss — surfacing a 4/4 rough board to 3/4" finished thickness removes roughly 15-20% of the material by volume. Cupped or twisted boards lose more.
- Crosscutting waste — you cut around checks, splits, and knots. On FAS-grade lumber, this might be 5%. On #2 Common, it can be 15-25%.
- Rip waste — kerf from every saw cut. A standard table saw blade has a 1/8" kerf. On a board you rip into three strips, that is 1/4" of paid-for wood turned into sawdust.
- Layout inefficiency — your parts rarely tile perfectly onto a board. The 3" strip between the last shelf and the edge of the board is paid-for wood that doesn't become product.
- Mistakes — the crosscut that was 1/4" short, the tearout that forced you to re-plane, the piece that cracked during glue-up.
Typical yield by grade (varies with project, board widths, and how aggressively you cull defects):
Lumber grade and rough rule-of-thumb yield percentage (rough board feet in vs. finished board feet out):
- FAS / Select: 75-85% yield
- #1 Common: 65-75% yield
- #2 Common: 50-65% yield
- Reclaimed / Salvage: 40-60% yield (highly variable)
This means if your project needs 14 board feet of finished material from #1 Common lumber, you should purchase 19-22 board feet, not 16-17. At $8 per board foot, that is a $24-48 difference in material cost — per project.
Track this on every build: Record the board feet you started with and the board feet of finished parts you ended up with. After five or six projects, you will know your actual yield percentage by grade and species. That number is worth more than any rule of thumb.
Your cutting yield checklist for each project:
- Board feet of rough lumber pulled from stock
- Board feet of finished parts after milling
- Yield percentage (finished / rough x 100)
- Board feet of usable offcuts returned to storage
- Board feet of waste (sawdust, scrap too small to save)
That last line is the one nobody tracks. It is also the one that explains where your money went.
Step 3: Stop ignoring consumables
Lumber gets all the attention because it is the big, visible cost. But consumables add up in ways that woodworkers consistently underestimate because each individual item feels cheap.
Consumables to track per project (manufacturer specs vary — check the data sheet for your specific brand):
- Sandpaper — a set of discs from 80 through 220 grit for a single tabletop can run $8-15 in abrasives. A full progression through 400 grit for a finish-critical piece doubles that.
- Finish — a quart of arm-R-seal or comparable wipe-on poly covers roughly 75-100 square feet per coat. A dining table with three coats can use most of a quart ($15-20). Spray lacquer, conversion varnish, and epoxy finishes cost significantly more per project.
- Glue — a 16-oz bottle of Titebond III is $9-12 and covers roughly 8-12 edge-glued joints depending on board length. A butcher block or panel glue-up can use a third of a bottle in one session.
- Hardware — hinges, drawer slides, screws, bolts, threaded inserts, shelf pins. These are easy to track per project because you buy specific quantities. Do it.
- Consumable tooling — router bits, saw blades, and drill bits wear out. A carbide router bit rated for 10,000 linear feet that cost $35 adds $0.0035 per foot of cut. On a project with 200 feet of routing, that is $0.70 — trivial for one project, but across 50 projects a year it is $35 of tool wear you never accounted for.
Most of these are small numbers individually. Combined across a project, they typically add $30-80 to your material cost. On a $500 cutting board set, that is 6-16% of revenue you forgot to include.
The simple approach: If per-item tracking feels like too much, calculate your average monthly consumable spend (sandpaper, finish, glue, bits) and divide by the number of projects you complete per month. Apply that average as a flat consumable surcharge per project. It won't be perfectly accurate, but it is infinitely better than zero.
Step 4: Build a project cost sheet before you quote
Every custom build should have a cost sheet before you name a price. Not after. Not "roughly in your head." On paper, on a screen, somewhere you can look at it when the customer asks why your table costs more than the one at the furniture store.
Project cost sheet checklist:
- Lumber cost — Species, board feet needed, your actual cost per board foot from your purchase log, adjusted for your known yield percentage. If the project needs 14 finished board feet and your yield on #1 Common white oak is 72%, you need 19.4 rough board feet. At $8.50/BF, that is $165 — not $119.
- Secondary materials — Plywood, MDF, or sheet goods for backs, drawer bottoms, jigs. Calculate from sheet dimensions: a 4x8 sheet of 1/2" Baltic birch at $65 gives you 32 square feet at $2.03/sqft.
- Hardware — Price every hinge, slide, knob, and fastener. Check your actual supplier prices, not the ones you remember from six months ago.
- Consumables — Finish, sandpaper, glue, edge banding, dowels. Estimate from your per-project average or calculate specifically.
- Subcontracted work — CNC time, wide-belt sanding, veneer pressing, upholstery, glass cutting. Get actual quotes before including these.
- Labor — Hours estimated x your shop rate. Be honest about how long things actually take, not how long you wish they took. If your last comparable project took 32 hours, bid 35-38, not 25.
- Overhead allocation — Shop rent, electricity, insurance, dust collection, tool maintenance. Divide your monthly overhead by the number of projects you complete per month. For most one-person shops, this is $15-40 per project hour.
- Delivery and installation — Vehicle costs, fuel, time, helper labor if needed.
Add these up. Then add your profit margin. Your profit margin is not your labor rate — it is the return on the business itself. A 15-20% margin on top of all costs (including labor) is reasonable for custom woodworking. Some makers go higher for specialty or high-demand work.
Tools like Ardent Seller make this easier by tracking your lumber inventory at the board foot level, logging costs per species and purchase lot, and calculating material costs per project automatically. When you pull 19 board feet of white oak from your rack, the system already knows what that specific lot cost and adjusts your inventory and project cost sheet in real time.
Step 5: Track your offcuts — they are inventory, not garbage
The pile under your workbench is money. Not much money per piece, but across a year of projects, offcuts represent a significant material investment that most woodworkers treat as zero-value waste.
An offcut management system:
- After every project, sort offcuts into three categories: usable (large enough for a future project or small product), shop jig stock (good for jigs, test pieces, setup blocks), and actual waste (too small, too damaged, or wrong species to be useful)
- Log usable offcuts with species, approximate dimensions, and the cost per board foot from the original purchase
- Store them organized by species — a labeled bin or rack section makes the difference between an offcut you use and one you forget about
- Use offcuts first when starting small projects. Cutting boards, coasters, small boxes, drawer organizers, and turned items are natural offcut consumers
- Track when offcuts get used in a project — their material cost is real and should be included in the project cost sheet at the original per-board-foot rate
Here is why this matters financially. Say you complete 30 projects a year and average 4 board feet of usable offcuts per project. At an average cost of $7/BF across species, that is $840 of material sitting under your bench. If you convert half of it into small products — cutting boards at $60 each, for instance — those products have near-zero marginal material cost because the wood is already paid for. The margin on offcut products can be dramatically higher than on your primary builds, and they can cover consumable costs for the whole shop.
The rule: If a piece of wood is large enough to become a product, it is not scrap. Track it, store it, and use it.
Step 6: Set your price from the cost sheet, not from the market
"But the guy down the road charges $1,200 for a similar table." He might. He is also probably not tracking his costs and not paying himself a reasonable rate. Competing on price with someone who is accidentally working for free is a race to the bottom.
Your price should come from your cost sheet, not from browsing Etsy or Facebook Marketplace. Here is the sequence:
- Calculate total material cost (lumber + secondary + hardware + consumables) from your cost sheet
- Calculate total labor cost (hours x your target hourly rate)
- Add overhead allocation
- Add delivery/installation if applicable
- Apply your profit margin (15-20%)
- That is your price. Compare it to the market as a sanity check, but do not reduce it just because someone else charges less
If your cost-based price is significantly higher than the market, you have three options: find cheaper materials (lower-grade lumber, different species), improve your efficiency (better jigs, batch operations, less rework), or accept that the market for that particular product doesn't support your cost structure and focus on products that do. What you should never do is lower your price below your costs to "stay competitive." That is not competing — that is subsidizing your customers.
A real example: A set of four walnut and steel bar stools.
- Walnut: 28 board feet finished, 38 BF rough at $11.50/BF = $437
- Steel legs (subcontracted): 4 sets at $45 = $180
- Hardware (levelers, mounting bolts): $22
- Consumables (finish, sandpaper, glue): $48
- Labor: 24 hours at $45/hr = $1,080
- Overhead: 24 hours at $22/hr = $528
- Subtotal: $2,295
- Profit margin (18%): $413
- Price: $2,708 (or $677 per stool)
Is that more than the mid-century modern knockoffs on Wayfair? Absolutely. Is it a fair price for handmade, custom walnut bar stools built to last 50 years? Also absolutely. Your cost sheet gives you the confidence to quote that number and explain exactly why it costs what it costs.
Stop guessing. Start measuring.
Every number in your pricing should trace back to something you actually tracked — a lumber receipt, a yield measurement, a consumable inventory, a time log. The woodworkers who build sustainable businesses are not the ones with the best tools or the fanciest shop. They are the ones who know their numbers.
Start with Step 1. Pull your last three lumber receipts and calculate the real cost per board foot. Then track your yield on your next project. Then log your consumables. Build the habit one layer at a time, and within a few months you will have a cost picture accurate enough to quote any project with confidence.
If you want a system that handles the tracking for you — lumber inventory by species and lot, cost per board foot, project material costs, and offcut management — give Ardent Seller a try. It is built for exactly this kind of maker math.
Related reading
- Recipe Costing 101 — Board feet, finishing supplies, and custom-build labor stacked into the same five-layer cost framework.
- Margin vs Markup — Why "doubling lumber cost" is not a 50% margin — and the conversion table you want next to your quote sheet.
- Wholesale Pricing for Handmade Products — How to price for galleries and shops carrying custom builds without giving away the bench-time margin.
Free resources
A few free downloads from the Ardent Workshop library that pair well with this post:
- Product Pricing Calculator (Excel) — Drop your board-foot lumber, hardware, finishes, and shop-time labor into the calculator with the platform fee from your sales channel. Suggested retail comes back with platform fees netted out — useful when a custom build is quoted off Etsy but ordered through it, and the fee math has to follow.
- Should I Raise My Prices? Decision Tool — A live web tool that runs the +10% / +20% / +30% price-hike math on one product — including the volume drop that comes with each — and tells you which scenario clears the most monthly profit.
- Craft Seller Startup Checklist — Pricing math, inventory cataloging, and the legal essentials (entity, sales tax, business banking) for woodworkers running a real shop behind the bench.
- Small Business Tax Deduction Cheat Sheet — A Schedule C walkthrough that covers the equipment depreciation, supplies, and contract-labor lines woodworkers tend to underclaim or misclassify.
- Vendor & Supplier Contact Organizer (Fillable PDF) — A four-page fillable directory for the lumberyards, hardwood dealers, hardware suppliers, and finish vendors a custom shop runs through. Vendor Record per supplier (account #, terms, lead time, MOQ, what they actually stock), an alternate-supplier scoring sheet, and a master vendor index — useful the next time your primary walnut source is out for six weeks.
This article is provided for educational purposes only and does not constitute financial, tax, or business advice. Cost structures, pricing examples, and margin figures are illustrative and will vary by your specific circumstances. Consult a qualified accountant or small-business advisor before making financial decisions based on this content.